Using the Applitools GitHub proxy service
Overview
Eyes/GitHub integration requires two ways communication between the Eyes server and the GitHub server.
Communication from the Eyes server to the GitHub server is needed during the setup phase, when you select repositories to integrate with. The Eyes server uses the GitHub API to create webhooks in the selected repositories which send all the relevant GitHub events to Eyes. The GitHub API is also used to update the status when an Eyes batch is completed and the status needs to be updated on the GitHub commit or pull request.
Communication from the GitHub server to the Eyes server is needed when events are sent by the webhooks to the Eyes server
If your GitHub server is protected behind a firewall, and you cannot add a custom rule that exposes the relevant GitHub APIs so that Eyes can call them, you can use the Eyes-scm application to create webhooks on the relevant GitHub repositories. Using Eyes-scm, the Eyes server never calls the GitHub APIs directly, all calls are made through the application.
To use Eyes-scm, you need to set up integration and select the required repository in the Eyes-scm interface, not in the Eyes server admin dashboard.
Once integration is complete, the commit or pull request status update flow is also performed by Eyes-scm. The Eyes-scm application constantly polls the Eyes server for status update commands and updates the status when needed on the GitHub server.
To use the Applitools GitHub proxy service, perform the following steps:
-
Creating the GitHub App for the Eyes integration. The Eyes GitHub integration requires that a GitHub App with the necessary permissions is created on your GitHub account.
-
Installing the GitHub App. This is done on the GitHub server.
-
Installing the proxy service. This is done on a server in your organization that has HTTPS access to the GitHub server.
Creating the GitHub App for the Eyes integration
A GitHub App is an entity created and stored on the GitHub server that defines the access permission for third-party tools. The Applitools Eyes/GitHub integration requires such a GitHub App so that it can receive pull and push request events and update status information on the repositories where the executed test code runs.
-
On the GitHub server that stores your repositories, click on the option to create a GitHub App.
We recommend you name the app Applitools Eyes Integration, so that other teams in your organization can easily find the app and use it as well.
-
Enable the Webhook option.
-
Set the Webhook URL to:
https://<My_Org>.applitools.com/api/externals/github/v2/events?orgId=<orgId>&serverId=<GitHub server host>where
<My_Org>is the name of your Eyes server. This is the value that is typically assigned to the environment variableAPPLITOOLS_SERVER_URL, or is passed in the test code to the methodConfiguration.setServerUrlorEyes.setServerUrl. -
In the Webhook secret field, enter the text you want to use as the secret. Save this text, you will need it later when configuring Eyes.
-
In the Repository Permission section, set the following permissions:
-
Metadata - read only
-
Pull requests - read only
-
Commit statuses - read & write
-
-
In the Subscribe to events section, select Pull request.
-
Copy the value displayed in the App ID field. You will need this later when configuring Eyes.
-
Click the Generate a private key button. This downloads a file with a .pem suffix. You will need the contents of the file later when configuring Eyes.
Installing the GitHub App
Once the GitHub App exists, you need to install it on your GitHub account. The procedure for doing this is described in the GitHub documentation.
All of the Eyes teams in your organization can share a GitHub App, or each team can create its own. The difference is only in the list of repositories configured for the GitHub App. The simplest scheme is that a single GitHub App provides access to all of the repositories used by all of the Eyes teams. Alternatively, each Eyes team can create its own GitHub App that provides Eyes with access to that team's repositories.
Installing the proxy service
The Applitools proxy service is a Node.js-based program that runs in the background, continually polling the Eyes server to see if it needs to update the GitHub server with status information. When Eyes indicates that it wants to update the status, the proxy service interacts with GitHub on behalf of Eyes.
Users need to complete a one-time configuration of the proxy service in order to provide access permission and other information that the service needs to implement the Eyes/GitHub interaction. This is done by accessing the proxy server using a browser.
Installation prerequisites
Before installing the proxy service, you must have:
-
Node.js installed (version 12 or later)
-
Yarn Installed
-
Information from the GitHub App creation:
-
Webhook secret
-
App ID
-
Content of the .pem file from the GitHub App installation.
-
-
The Eyes server URL, this is the URL that you use the open the Test Manager
-
Your Eyes organization ID, available in the Admin/Account page in the ID field.
One-time setup
Set up the following environment variables so that they are available to the proxy service.
# set the Eyes server URL to your server
EYES_SERVER_URL=https://myOrg-eyes-api.applitools.com
#set the Eyes organization ID
EYES_ORG_ID=xx1234HxxXv987AB24q1vlF25BxxYaZ1234x5Hk3XaSa111
# set the HTTP port the proxy service should use (optional - default is 4000)
PORT=1234
To install the proxy server run the following from any command shell:
npm i -g @applitools/eyes-scmRunning and configuring the server
Use the following command to start the server:
eyes-scmConfiguring repositories and access credentials
The first time your run the server, you need to define the repositories you want to allow Eyes to access and provide the necessary Eyes and GitHub credentials. To do this, start the proxy service and then access it with a browser.
-
Make sure the proxy service is running as described in One-time setup.
Start a browser on the server where the proxy is running and navigate to the proxy service. The default URL is localhost:4000.
-
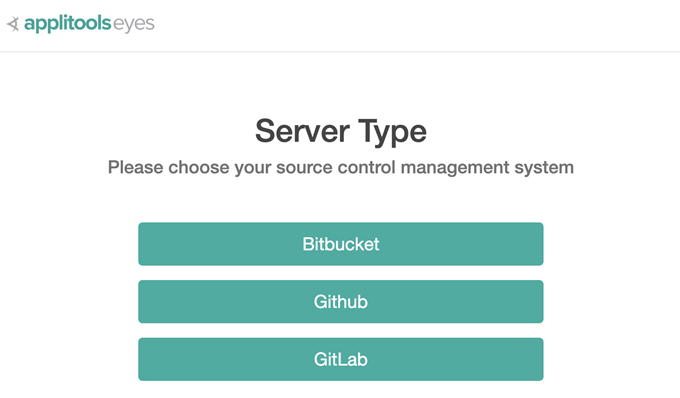
Select Github as the source control management system.
-
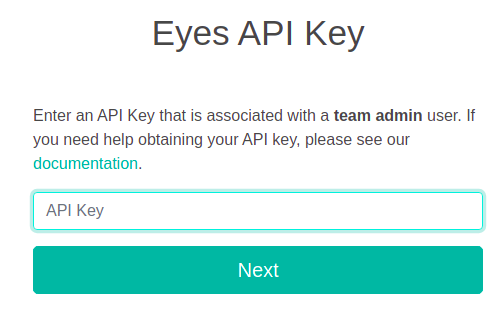
Enter an Eyes API key with Team Admin rights and full privileges. See How to retrieve your API key.
-
Click Next.
-
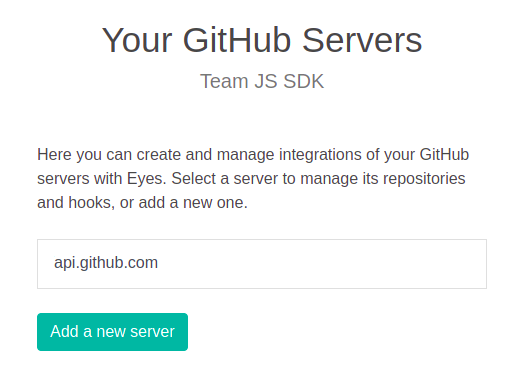
If this is your initial installation, click Add a new server.
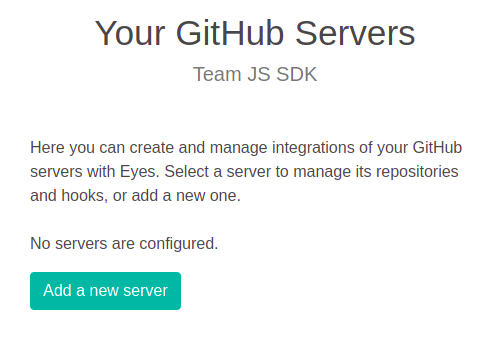
If you are reconfiguring an existing installation, then you will see a list of GitHub servers that are currently installed. Either select an existing server from the list or click on Add a new server.
-
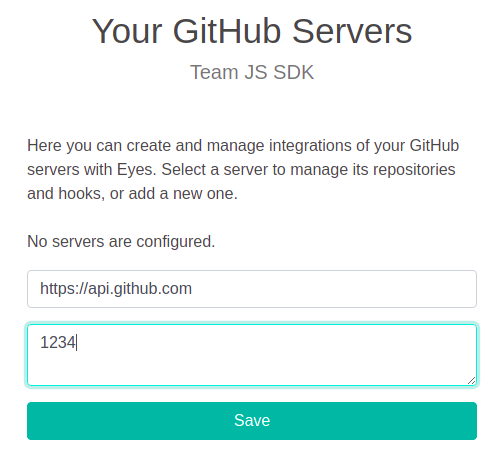
Enter the URL of your GitHub server and the secret entered when the GitHub App was created.
-
Click Save.
-
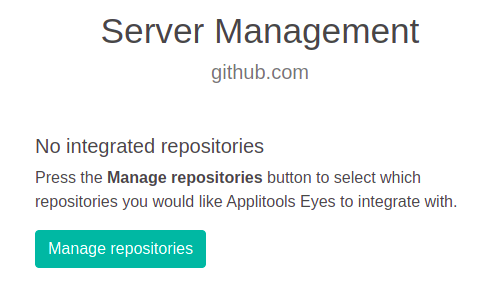
In the list of servers, click on the server to configure it.
-
On the first installation, no repositories will have been enabled, click Manage Repositories to select the repositories that you want Eyes to integrate with.
-
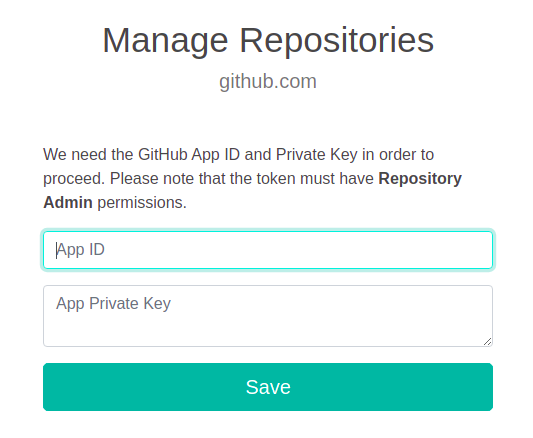
On the first installation, as repositories have been enable the dialog will ask you to enter the GitHub App ID and the App private key (the entire contents of the downloaded .pem file). Enter these details and click Save.
-
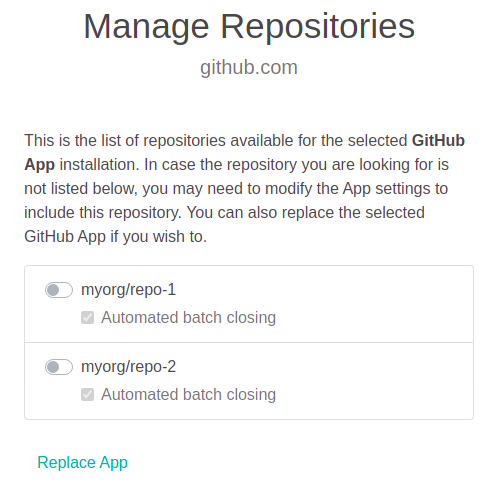
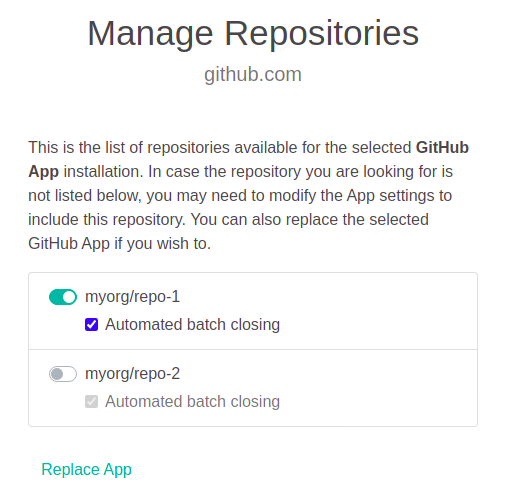
A screen with a list of all the repositories on the SCM server is displayed. The first time you configure the proxy service, all of the repositories are disabled (grayed out). Enable the repositories that you want Eyes to access.
-
By default, GitHub integration closes a batch automatically once the CI build operation is completed. If your build runs concurrently or consists of multiple tests and you want all of the results to appear together in a single batch, disable automated batch closing and close the batch explicitly when the build is complete in your CI.
To disable Automated batch closing, clear the checkbox for the that repository.
Changing the configuration
If you want to enable or remove access to repositories, or to change the Eyes API Key or the GitHub App, then open the browser to the proxy service, as described above, and make the necessary changes.
As part of the GitHub integration, the Eyes server sends batch status information to the GitHub server. Applitools provides two different ways to implement this Eyes/GitHub interaction:
-
Eyes/GitHub HTTPS interaction. This is the recommended method when Eyes can directly interact with a GitHub cloud or on a on-premise GitHub server where Eyes has permission to access the network.
-
Eyes/GitHub interaction using a proxy service. This method is used when direct access by Eyes to GitHub is not available.
This article describes how to setup the proxy service. The setup when Eye can directly interact with GitHub is described in Using Eyes with GitHub.
The Applitools Bitbucket or Github proxy service.
Applitools provides the proxy service for customers that can't provide Eyes with direct HTTPS access to the GitHub server. The proxy service runs on the same network as the GitHub server, and has the following roles:
-
Provides a setup wizard that guides the user to provide the information required by the proxy service such as the GitHub server URL, the names of the repositories where Eyes tests are being run and the Personal access token required to access them. The user also provides the URL of the Eyes server and API Key.
-
Once the setup information has been provided, the proxy service runs in the background, continually polling the Eyes server to see if it needs to update the GitHub server with status information. When Eyes indicates that it has a status update, the proxy service obtains the information and updates the GitHub server on behalf of the Eyes server.